

monkey shorts: little shorts to wear under your skirt while playing on the monkey bars.
the girl will be starting grade three in a few days and we've been getting ready - shoe shopping, labelling clothes, and organizing her uniform. we decided that maybe it might be nice to have some little shorts to wear over her underwear/under her skirt - to preserve a little modesty while climbing the playground equipment during recess. i used an old pair of leggings as the basis for the new shorts.
Materials:
- one yard of cotton jersey, pre-shrunk (can make about 6 pairs depending on size). i used navy blue to comply with school uniform requirements. old t-shirts would work well if they are very stretchy.
- 1/2" wide elastic, a couple of yards if you want to make a few pairs
- thread to match jersey fabric
- small pieces of ribbon (optional) to use as tags/labels
- tracing paper or scrap paper, paper cutting scissors, pencil, ruler
- old pair of leggings or jersey tights to use as a pattern
Equipment:
- sewing machine (that can sew zig zag stitch)
- serger machine (not necessary but very nice to have)
- sewing machine needle for knit fabrics
- twin sewing machine needle for knit fabrics (not necessary, but great for finishing hems on knit fabrics)
- scissors or rotary cutter (for fabric)
- pins
- measuring tape

Step 1: Cut the old pair of leggings to desired length and cut along seam lines.
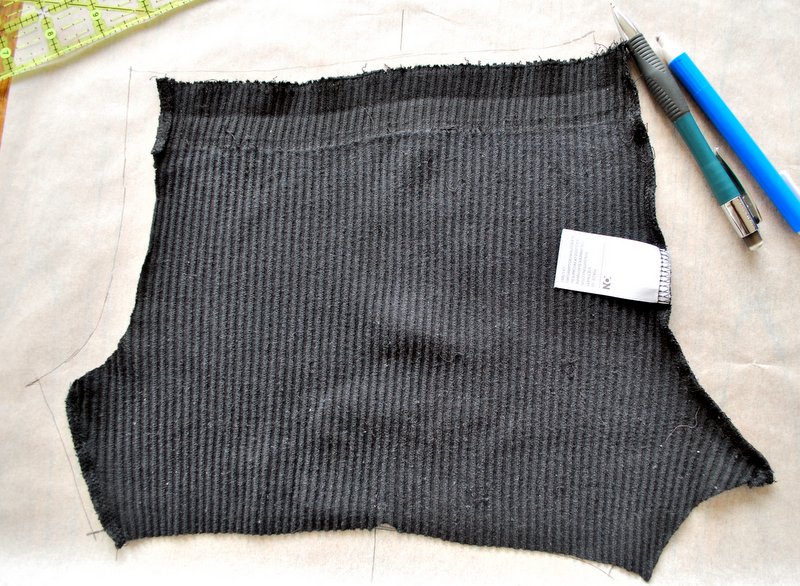
Step 2: Lay the leggings onto the tracing paper and trace in pencil.

Step 3: Add 1/4" seam allowance to the seams and 1/2" to the hem. Draw a line to indicate the grainline and label with any notes you might need. Cut out the pattern with your paper scissors.

Step 4: Pin the pattern to a double layer of the fabric, lining up the grain line. Cut out using your fabric scissors or a rotary cutter.

Step 5: With the fabric pieces right sides together, pin the leg seams together.

Step 6: Sew the leg seams making sure to remove pins as you go. If you are using a serger (as I did), just trim off a little as you sew. The seams can be sewn using a standard sewing machine - use a stretch stitch or a narrow zig zag stitch. Stretch the seams as you sew.

Step 7: Turn one leg right side out.

Step 8: Place one leg inside the other, right sides together. Match leg seams and pin.

Step 9: Sew the crotch (is there another word?) seam together, removing pins as you sew. Again, you can use a zig zag or stretch stitch with a standard sewing machine if you don't have a serger. Remember to stretch seams as you sew - we wouldn't want this important seam to split open while on the monkey bars or doing cart wheels!

Step 10: To hem the legs, turn up the bottom of each leg 1/2" and pin. Sew from the right side using a standard sewing machine with a twin needle or using one single needle with a zig zag stitch. Don't forget to stretch the fabric and remove pins as you sew.

Step 11: Measure the elastic waistband from the old leggings and add 1". Or wrap the elastic around your child's waist, stretching it slightly. Lap the edges of the elastic over 1/2". Zig zag stitch the elastic together.

Step 12: Divide the elastic waistband into four even sections and mark with pins. Do the same for the shorts. Pin the waistband to the wrong side of the shorts, aligning edges. Stitch edges from the right side using a serger OR zig zag stitch if using a standard sewing machine. Remember to stretch your fabric and elastic and to remove pins as you sew.

Step 13: Fold over the waistband to the wrong side (interior) of the shorts and pin. At this point you can add a little piece of ribbon to the center of the back (optional).

Step 14: Using the twin needle, sew the waistband while stretching the fabric/elastic and removing pins as you go. This can also be done using a standard sewing machine with a zig zag stitch.

Step 15: Make a lot of monkey shorts and play, play, play!


